In this tutorial you'll be introduced to Cloud Controls - our easy, powerful way to visualize sensor data, remotely control actuators, and a lot more.
You'll learn how to use your internet-connected microcontroller to:
1Log in to Temboo. If you don't already have an account, you can sign up for free.
2Once you're logged in, go to our code generation tool and find the Gmailv2 > Messages > SendMessage Choreo. We're using this Choreo as an example, but you can use cloud controls with any Choreo of your choice. A Choreo is a cloud-based process that connects your Yún to any web-based service, and every Temboo application is associated with at least one Choreo. In this tutorial, we're not going to focus on running the Choreo but rather on monitoring your Yún's sensors and remotely controlling its actuators.
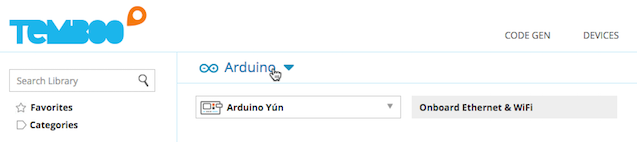
3Select Arduino from the drop down menu at the top of the Choreo page, then select the Arduino Yún.
4The first thing we're going to do is set up a sensor to send data to Temboo, using the interactive virtual board to wire a pin to the cloud. For this tutorial, we're simply going to read directly from a pin and send a voltage value to the graph, but if you select a specific sensor then we'll handle the sensor conversion for you. You can set safe and caution bounds so that your sensor data graph will draw different colors depending on the sensor values.
Set up your sensor on pin 6 as shown below, selecting category 'Other' and setting the safe bounds as 1-4 and the caution bounds as +/- 1.
5Once you've got your sensor pin set up, we'll use it to set a condition that prevents our application from attempting to trigger the email alert.
6Now that you've got your sensor pin set up to send data to Temboo, we'll set up an actuator so that we can remotely control the LED associated with pin 13 of your Arduino Yún. Use the virtual board to set up a digital actuator on pin 13 as shown in the gif below.
While you've been setting up sensors and actuators via the virtual board, Temboo has been generating code for you behind the scenes. To download the compiled application that gives you access to Cloud Controls, you first need to register your device. If you'd rather work with our editable code, then you can find numerous tutorials on that topic here here.
7Scroll down and find the Code section. Click the gear icon and choose Compiled. Click the Download button that appears.
8Next, register your Arduino Yún with Temboo so that we can display your sensor data and give you controls to remotely turn on and off the LED on your Yún. You can use whatever values you like to register your device, and then hit save. Your compiled application will start to download to your computer.
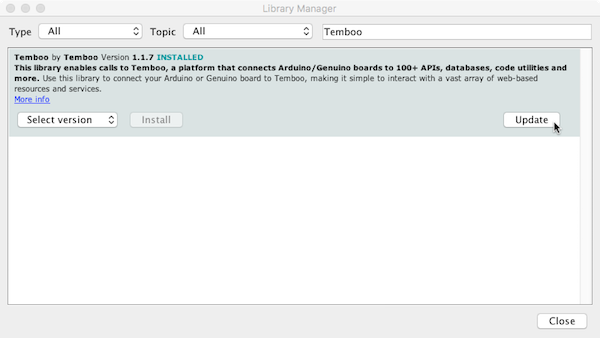
Since this tutorial uses the Arduino Yún, you’ll need to download and install the latest version of the Arduino IDE. Once you've got it, make sure that you have the latest version of the Temboo library for Arduino by going to the Sketch > Include Library > Manage Libraries... menu in the Arduino IDE, finding the Temboo library, and upgrading to the latest version as necessary.
You’ll also need to connect your Yún to the internet. If you need help with that, take a look at Arduino's excellent documentation.
Finally, go to the File > Examples > Temboo > ArduinoYun menu and run the CloudControlsConfig sketch to prepare your Yún for running a Cloud Controls application. Now you're ready to start generating code!
9Find the downloaded .zip file and extract the contents (hint: the file name will contain the ID of the device your just registered). Locate the .hex file within - this is the compiled version of the application that you just set up via our website.
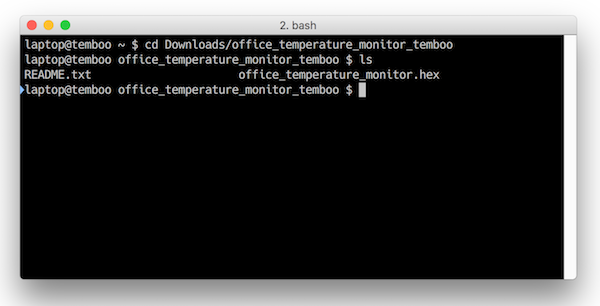
10Next, open a terminal window and we'll run some commands to upload the .hex file to your Arduino Yún. Here's a good intro to running shell commands if you need help.
Begin by navigating to the directory with your unzipped file in it. You can see an example below.
Once you’ve navigated to the location of your .hex file, you can use the SCP command to copy the compiled application to your Yún. In the command below, make sure to substitute in the name of your .hex file in place of the your_app placeholder. If you're on a network with more than one Arduino Yún you should use your Yún's IP address instead of arduino.local. You can find the IP address for your Yún in the Tools > Port menu of the Arduino IDE.
When you've edited the command as necessary, navigate to the location of your .hex file and run your command. Remember, unless you've changed it, your Yún's password is arduino.
scp your_app.hex root@arduino.local:/tmp
Next, SSH into your Yún by running the command below. Again, swap in your IP address in place of arduino.local as necessary. If you need help getting started with SSH on the Yún, Arduino have instructions specific to the Yún that will tell you what you need to know.
ssh root@arduino.local
Once you've gained access to your Yún via SSH, run the following command to merge your sketch with the boot loader. Make sure to swap in your .hex file name in place of the your_app placeholder value.
merge-sketch-with-bootloader.lua /tmp/your_app.hex
Finally, run this command to program your microcontroller to run the application (again, swap in your .hex file in place of the placeholder value). With the application running on your Yún, you're ready to check out your sensor data graphs and remotely control your Yún.
run-avrdude /tmp/your_app.hex
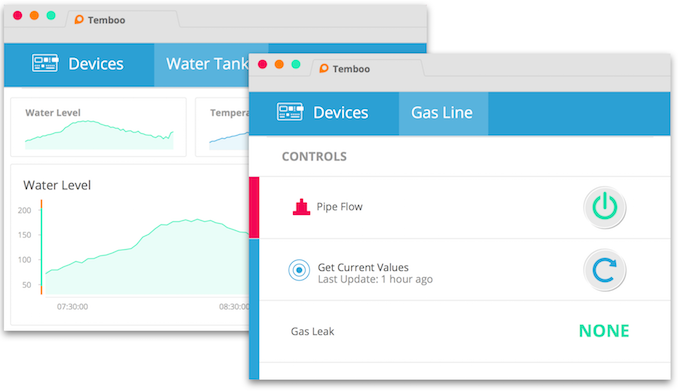
11Now that your Cloud Controls application is running on your Yún, head over to your Devices page to see it in action. A virtual representation of your device will be waiting for you.
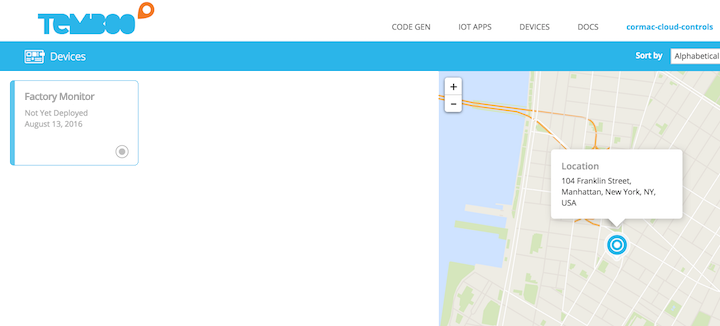
12Select the device that you registered and you'll see a sensor data graph and the option to remotely control your LED. Go ahead and control your LED from your browser, and you can also retrieve the latest value of the sensor you're monitoring whenever you like.

Congratulations! You've just created your first Cloud Controls application, complete with sensor data monitoring and remote control, all without writing any code. Now that you know how to connect your Yún to the cloud with Temboo, you're just a few steps away from making something extraordinary. With Temboo handling all the small stuff, you're free to think big.
Now that you know how to use Cloud Controls and how to trigger Choreos, you're just a few steps away from making something extraordinary. With Temboo handling all the small stuff, you're free to think big. Why not explore our Choreo Library and start planning your next project?
We're always happy to help. Just email us at support@temboo.com, and we'll answer your questions.