Hardware

Build M2M applications with HTTP


Many of the most interesting IoT applications involve multiple local devices communicating with an internet-connected gateway. Temboo can generate code for complete multi-device application scenarios, in which edge devices use a common IoT communications protocol to send Temboo requests through a gateway. The gateway handles all communication with Temboo, thereby enabling local edge devices to indirectly interact with the huge range of web-based resources supported by Temboo.

In this tutorial we discuss how to use Temboo to set up a multi-device application that uses HTTP, but we also support for MQTT and CoAP. Here, we're setting up a gateway and edge device that log sensor data to Google Sheets. Based on the requirements of your particular application, you can easily swap out Google Sheets for any of the 2000+ processes in our Library.


Let's Get Started

The first thing we'll do is get set up with Google Sheets so we can log sensor data from our devices. If you don't want to use Google Sheets for your application, but want to learn how to use Temboo to generate M2M code for a different application scenario, you can skip to the next section to get started setting up your gateway device.

1Before you get started, you'll need a Temboo account. If you don't already have one, you can sign up for free now.

2Since this sketch uses a Google spreadsheet, you'll also need a Google account.

3Login to Google's Developer Console, and create a new Project if you haven't done so already.

4Under the API Manager section, select Library and make sure you've enabled API Access for the Google Sheets API.

5Select Credentials in the API Manager section, and create a new Client ID specifying Web application for the Application Type.

6When configuring the Consent Screen, make sure you fill out the Email Address and Product Name fields.

7Save the Consent Screen details and specify the callback URL below as the Authorized Redirect URI. Make sure to replace ACCOUNT_NAME with your Temboo account name.

https://ACCOUNT_NAME.temboolive.com/callback/google

8 
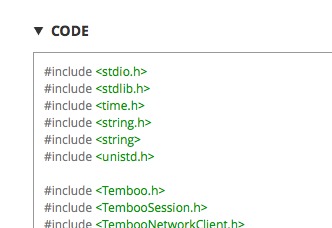
Go to the Google > OAuth > InitializeOAuth Choreo page, and fill in the Client ID from the app you registered at Google and the following Scope: https://www.googleapis.com/auth/spreadsheets. Then click Generate Code to run the Choreo from our site.

Google OAuth Inputs

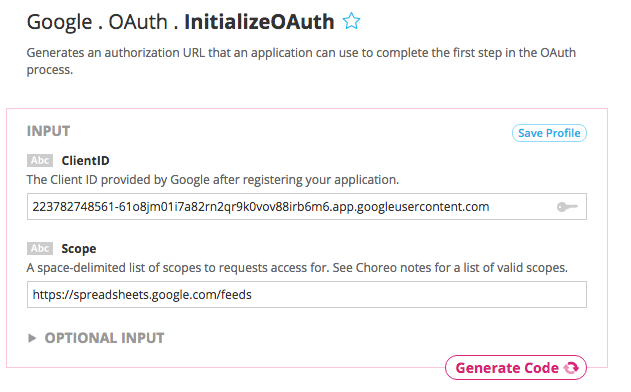
The InitializeOAuth choreo will return an authorization URL and a callback ID (required for the FinalizeOAuth step).

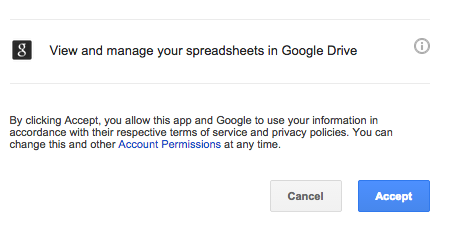
9Open a new web browser, navigate to the authorization URL returned by the InitializeOAuth Choreo, and click Accept to grant the app access to your Google account.

Google OAuth Accept

10Go to the Google > OAuth > FinalizeOAuth Choreo page, and specify the callback ID returned earlier by the InitializeOAuth Choreo. Then click Generate Code to run the Choreo from our site. This process will return a Refresh Token which can be used along with the Client ID and Client Secret to authenticate with Google.

11Create a Google Spreadsheet. In this example our spreadsheet has two columns as seen below: time (in milliseconds) and sensor values.

Google Spreadsheet

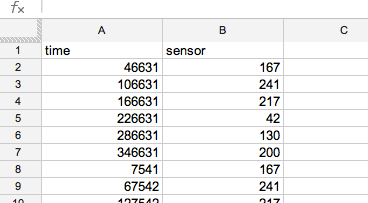
A screenshot of a spreadsheet taking data from a Yún - note the column names

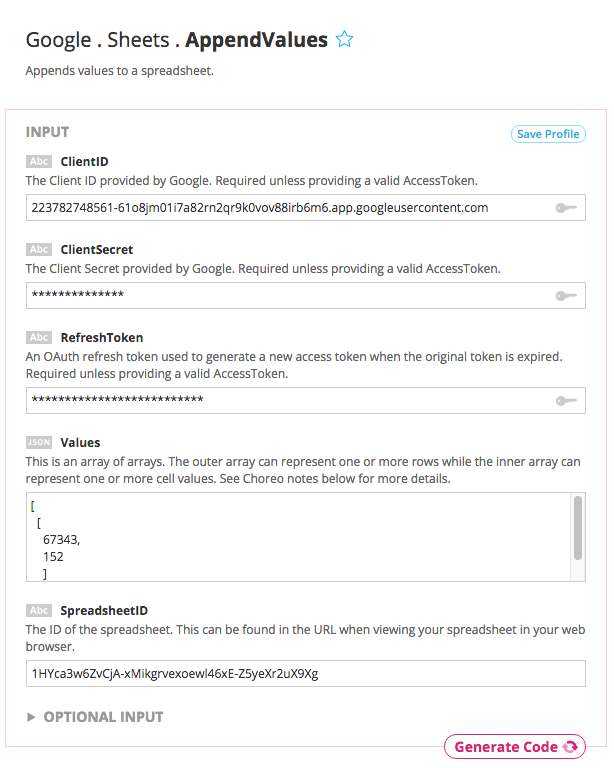
12When viewing your spreadsheet, you'll see a spreadsheet ID in your browser's URL bar. Copy this ID because you'll need it when running the AppendValues Choreo. In the example below, the highlighted part is the Spreadsheet ID.

Google Spreadsheet

Configure Your HTTP Gateway

Now that you're set up with Google Sheets, you're ready to start building your application. We'll begin by setting up the Gateway device.

1Since our gateway device is going to be responsible for logging data to a Google Sheet, we'll start over on the Google > Sheets > AppendValues Choreo page.

2Use the drop down menu at the top of the page to select a device that is capable of acting as a Gateway. In this example we're using a Samsung ARTIK 10 with HTTP as our protocol.

alt=

Selecting the HTTP protocol from the Gateway dropdown

3Next, enter the details of your HTTP gateway device.

Enter and save HTTP gateway settings

Entering HTTP gateway device settings

4With your gateway device configured, populate the Google Sheets Choreo form with all of the details that we need to log data to our spreadsheet, using the credentials we generated earlier. You can find example inputs at the bottom of the Choreo page, and you can test it out by hitting the Generate Code button, which will trigger the data to log to your Google Sheet directly from our website.

Google Spreadsheets Inputs

Testing the AppendValues Choreo from our website

5Now, scroll down to the Code section of the Choreo page and you'll find the auto-generated code for your Samsung ARTIK gateway device. Now we're ready to move on and set up our edge devices.

Auto-generated HTTP gateway device code

Auto-generated HTTP gateway device code

Set Up Your Edge Devices

Now that we've configured our HTTP gateway and generated code so that it will log data from its sensors to a Google Sheet, we can set up an edge device to log its sensor data, too.

1First, add a new edge device by clicking on the +Edge tab.

Add a new HTTP edge device

Adding a new edge device

2Next, select your edge device type and how it is connected to the gateway. We're going to use a Texas Instruments LaunchPad connected via Wifi.

Select a HTTP edge device type and connectivity

Configuring the edge device type and connectivity

3Now, we're going to pick the Choreo that this edge device will run via the HTTP gateway. Since this edge device will be logging its sensor data as well, we'll use the Google > Sheets > AppendValues Choreo.

Select an edge device Choreo to call on the M2M gateway via HTTP

Selecting a Choreo for the edge device to call via the gateway

4You can use this same technique to add many edge devices to perform different physical and web-based operations relevant to your application.

5Scroll down to the Code section on each edge device you set up, and you'll find that the relevant code has been generated for your edge device. This means that we're ready to take our generated code for all devices, start the gateway, and run the application.

Run The Application

Now that you've generated code for you gateway and edge devices, you're ready to deploy the code and test out your M2M application. We'll start by running the HTTP gateway, then starting up the gateway and edge device Choreo programs.

1Make sure that you have the latest Temboo image or package for your gateway device - this will ensure that you have the necessary Temboo M2M gateway libraries on your device. You can find Samsung's ARTIK images here, and for the Arduino Yún you can run: opkg upgrade temboo

2SSH into your gateway device and run the HTTP gateway, first by navigating to the location of the gateway script and then by running the script. With the gateway running, you should see feedback in your terminal window confirming that the HTTP gateway is running as expected.

Samsung ARTIK 10 gateway location

cd /opt/iothub/artik/temboo/temboo_artik_library/m2m/http

Arduino Yún gateway location

cd /usr/bin/temboo-m2m/http

Start HTTP gateway (make sure to sub in your gateway IP address)

python TembooHTTPGateway.pyc -a 0.0.0.0 -s yes -d

Setting up the Temboo M2M gateway with HTTP

Starting the Temboo HTTP gateway

Now's a good time to review the script options that we're using above. We've chosen to use HTTPS to send Choreo requests to Temboo from our gateway, and to turn debug mode on so that we can monitor activity more clearly. You can adjust these options as desired.

  • -s yes|no|ifavailable, --https=yes|no|ifavailable
  • -d, --debug

Note: The Arduino Yún does not include SSL for Python by default, so you'll need to install that yourself if required. Communication with edge devices is always handled via HTTP.

For instructions on how to get set up with other protools, check out our MQTT and CoAP tutorials.

3The last step is to compile and run your gateway and edge device Choreo programs. If you haven't run Temboo code on a device before and need help with this step, we have simple getting started instructions for all devices. When the Choreo programs are running successfully, you'll be able to monitor the HTTP messages being sent to the gateway by watching the output on the terminal window that you used to start your gateway.

4That's it! You've built a multi-device M2M application that uses HTTP to communicate with with Temboo via an internet-connected gateway.

WHAT'S NEXT?

Now that you know how to generate code for multiple devices, why not check out the 2000+ Choreos in our Library and start thinking about all the possibilities for your next M2M application?

Need Help?

We're always happy to help. Just email us at support@temboo.com, and we'll answer your questions.


Back