Here we'll show you how to use our JavaScript SDK and a server-side proxy language to upload a file to Dropbox. We’ll use PHP as our server-side proxy language for this tutorial, but you can also use Node.js, Ruby, Java, or Python.
To learn more about using non-PHP proxy languages, take a look at our web application server tutorial.
1Log in to Temboo. If you don't already have an account, you can register for free.
2Create a new .html file and save it as index.html into a folder where you'll save the rest of your project files.
3Create a new .php file and save it as proxy-server.php into the same project folder as your index.html file.
4Download the latest Temboo JavaScript SDK and unzip the file.
5Change the name of the resulting folder to js-sdk and move it into the same folder as your index.html file.
6Download the latest Temboo PHP SDK and unzip the file.
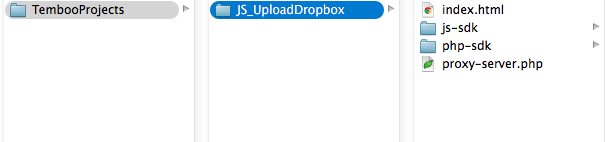
7Change the name of the resulting folder to php-sdk and move it into the same folder as your index.html file. Your project folder should look similar to the screenshot below:
8You'll need a free Dropbox account. If you don't already have one, you can sign up here.
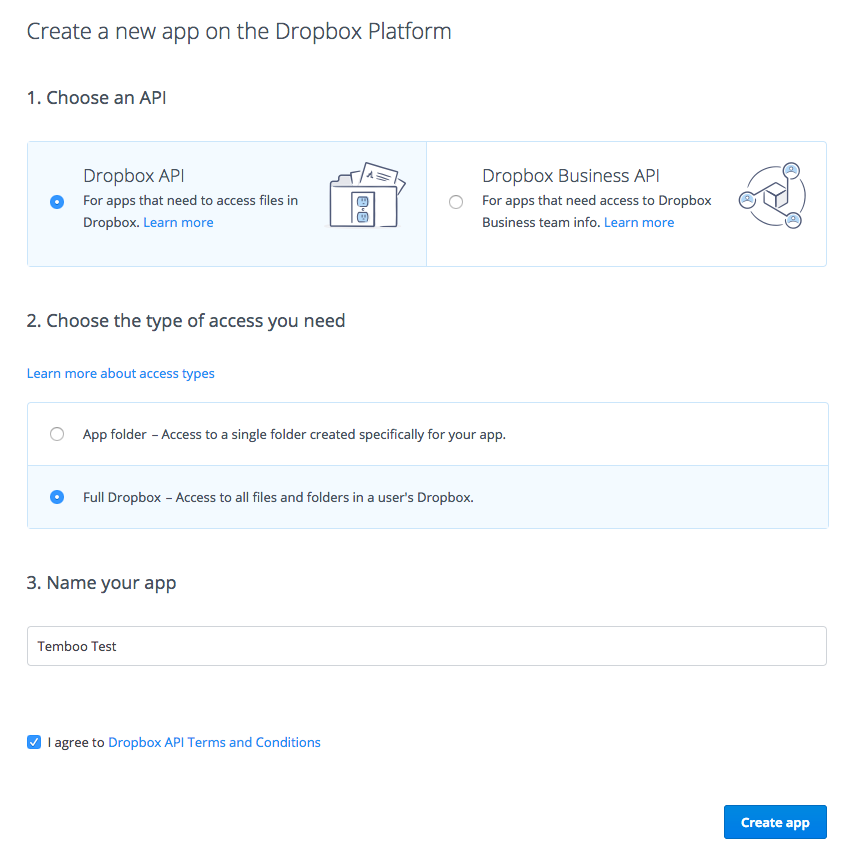
9If you haven't already, create a Dropbox app in the Dropbox App Console.
When asked to choose an API, select Dropbox API. Choose the type of access your application will need: App folder or Full Dropbox. The app name can be whatever you like. When you're done, click Create app.
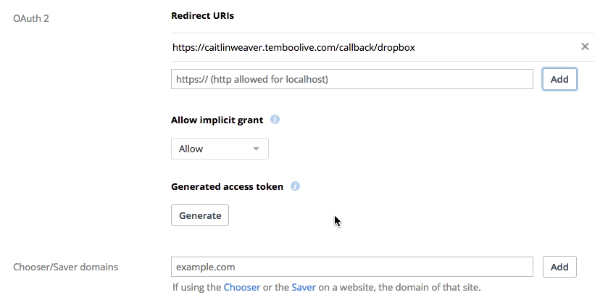
10On the next page, specify the callback URL below as a Redirect URI. Make sure to replace ACCOUNT_NAME with your Temboo account name.
https://ACCOUNT_NAME.temboolive.com/callback/dropbox
11If you will only be needing access to your own account, you can generate an Access Token in the Dropbox App Console. Click the Generate button in the OAuth 2 section of your app settings page.
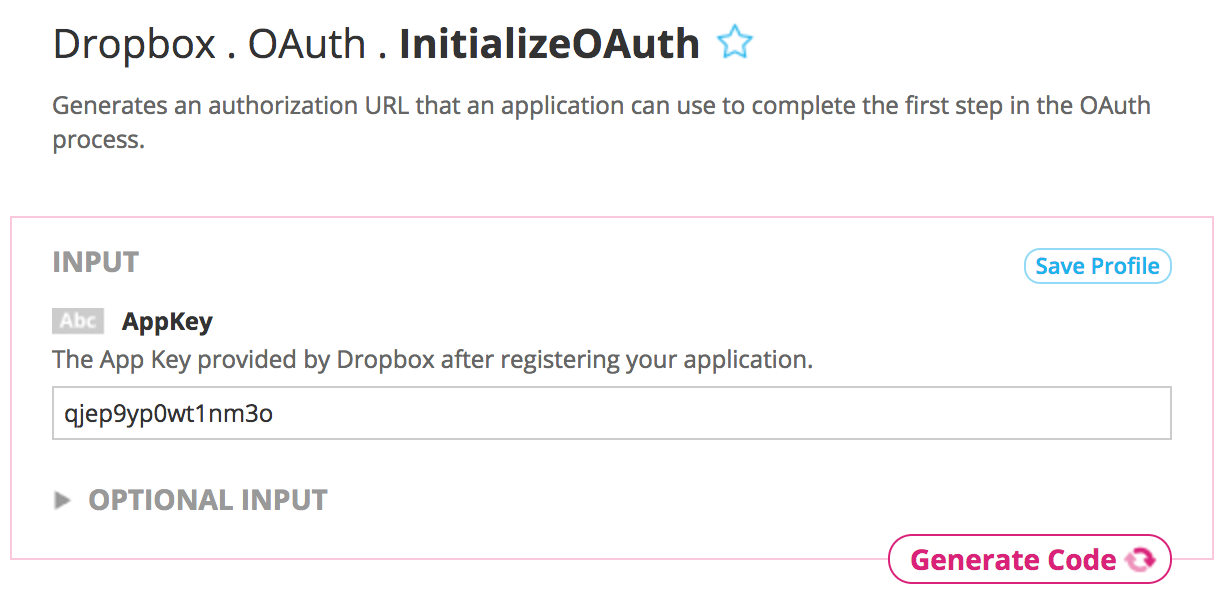
12In order to access Dropbox accounts other than your own, you will need to complete the OAuth process. If you only need access to your own account, you can skip ahead to the next section.
To begin, go to Dropbox > OAuth > InitializeOAuth in the Temboo code generation library. In the INPUT section of the page, enter the AppKey found on your app settings page within the Dropbox App Console.
13Click the Generate Code button to run InitializeOAuth from the Temboo site. Scroll down to the OUTPUT section of the page. Save the CallbackID to use in the next steps.
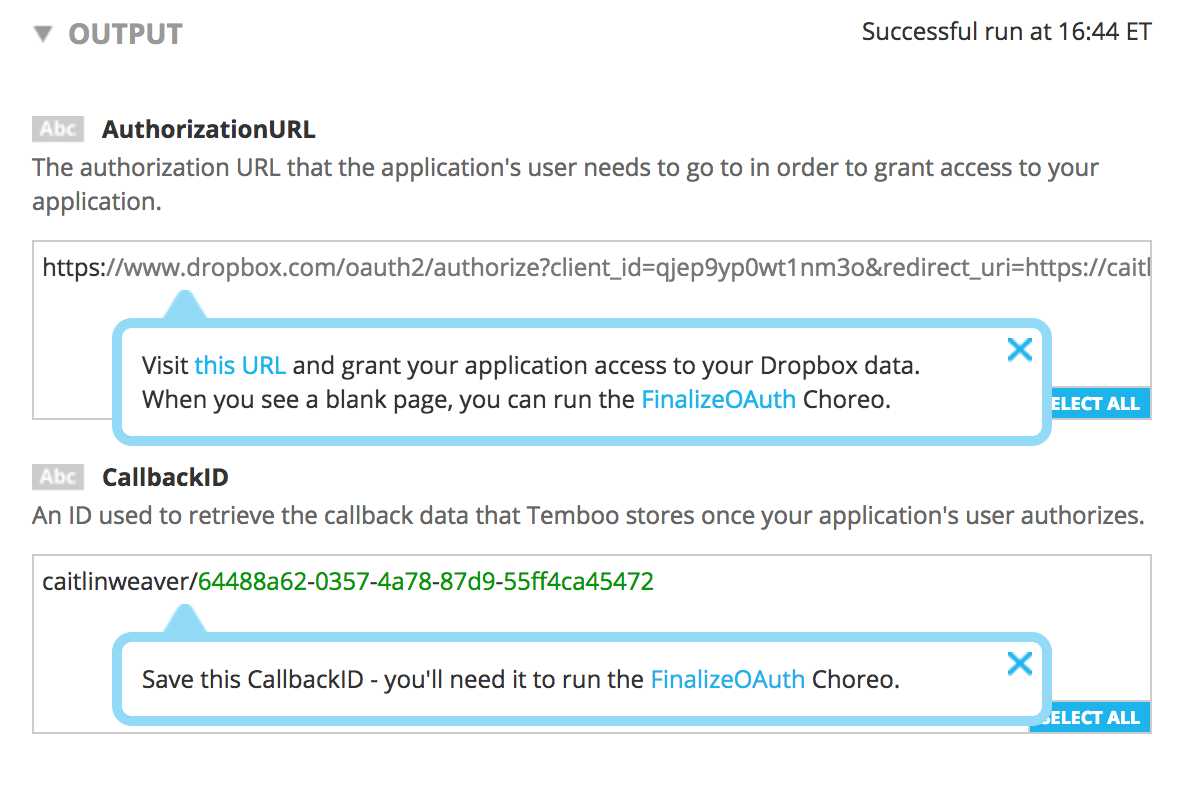
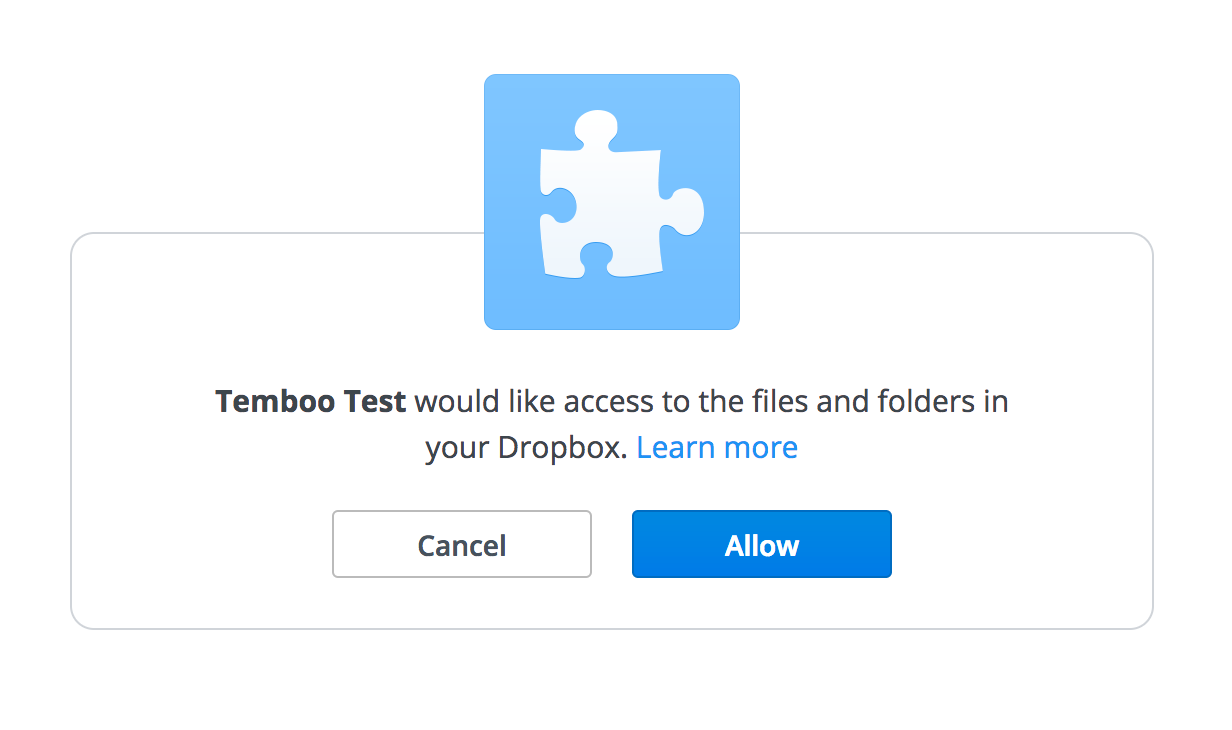
14The owner of the Dropbox account that your application needs to access will need to visit the AuthorizationURL found in the OUTPUT section. They should click the Allow button on the page to grant the application permission to access their account. Once they see a blank page in the browser, it's safe to close the page.
15Once permission has been granted on the AuthorizationURL page, you're ready to complete the OAuth process. Visit Dropbox > OAuth > FinalizeOAuth in the Temboo code generation library. In the INPUT section of the page, enter the AppKey and AppSecret found on your app settings page in the Dropbox App Console.
Supply the CallbackID that was returned in the OUTPUT section of the InitializeOAuth page.
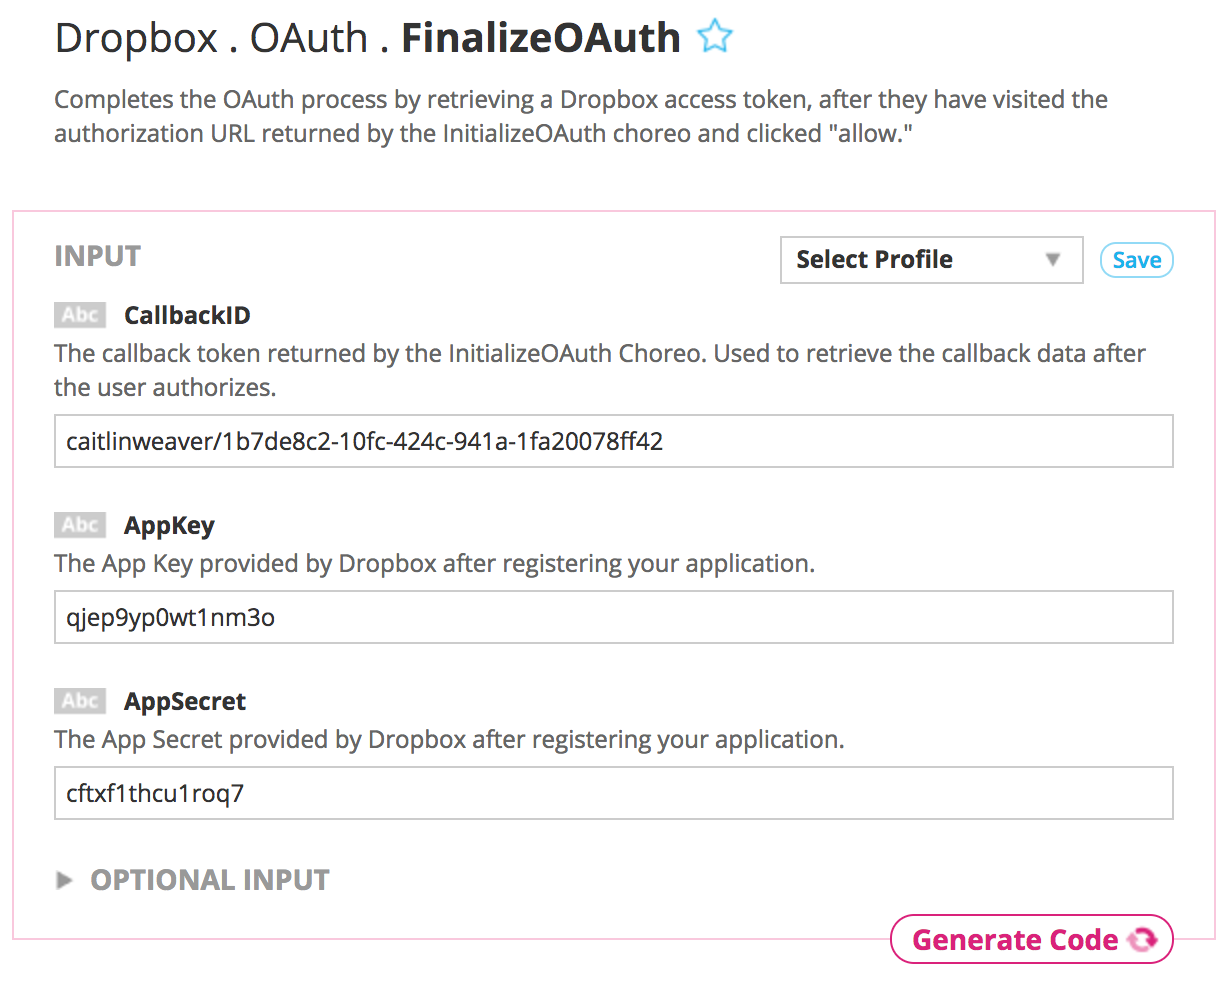
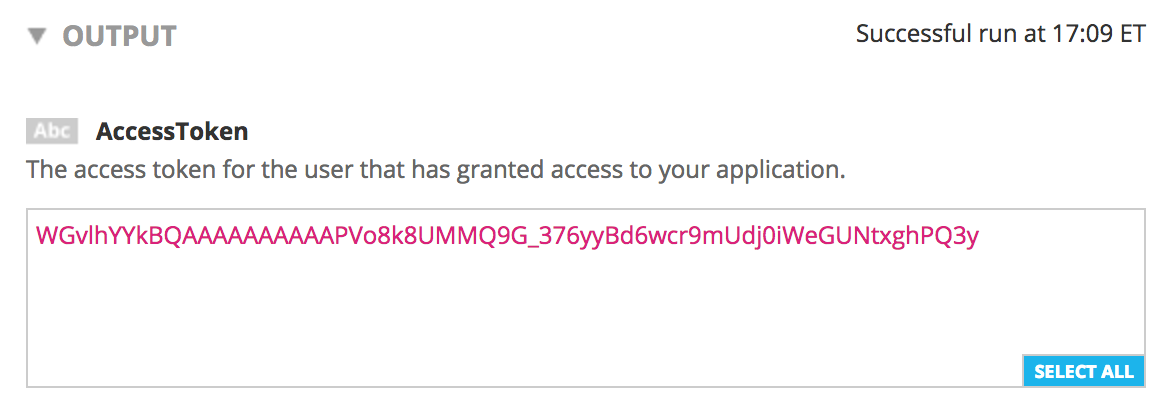
16Now, with all the required inputs in place, click the Generate Code button to run FinalizeOAuth from the Temboo site. Scroll down once again to the OUTPUT section of the page. Here you'll find the AccessToken you'll need for any Dropbox processes for this user's account. Save it for later.
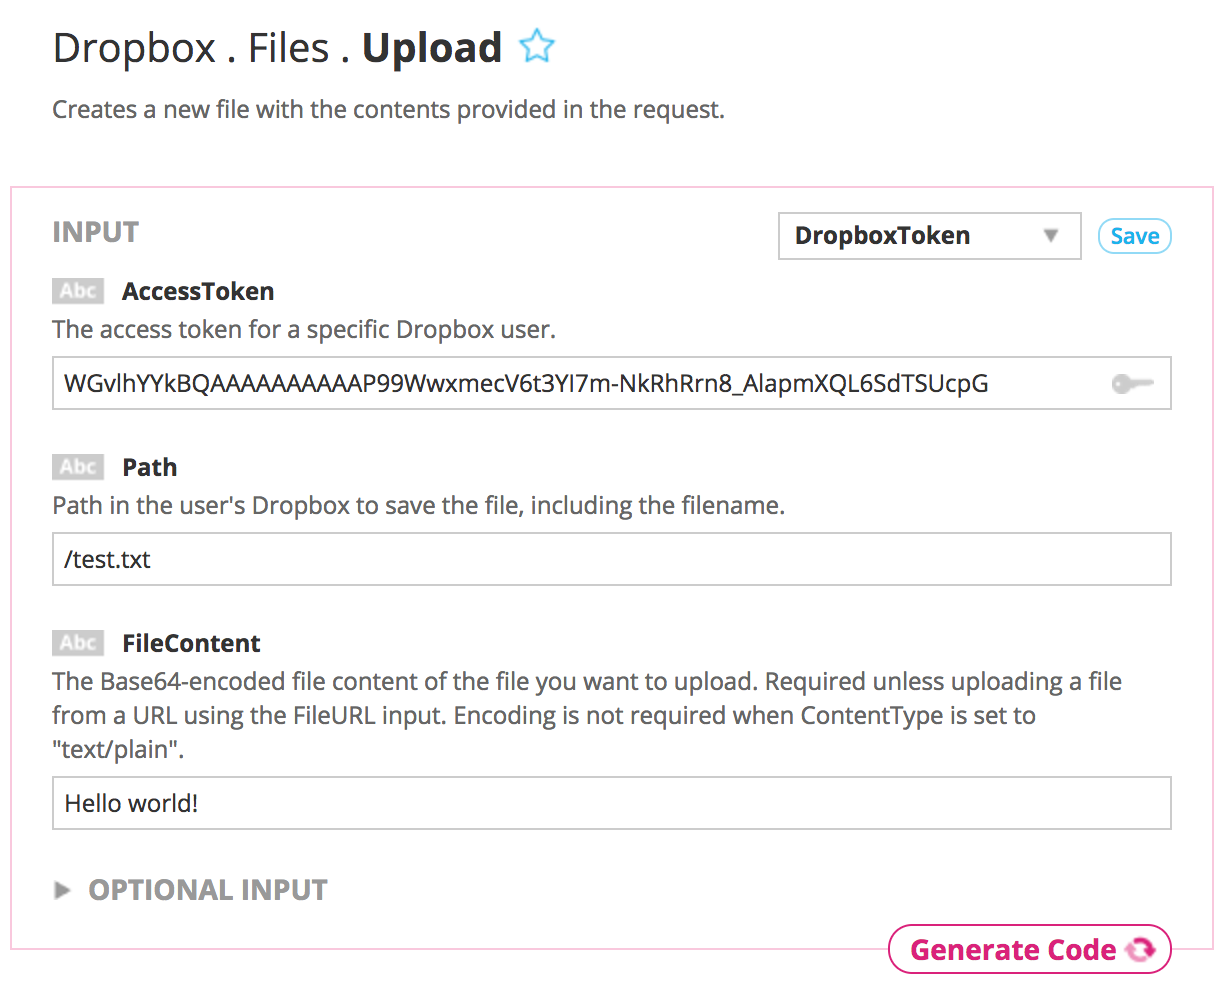
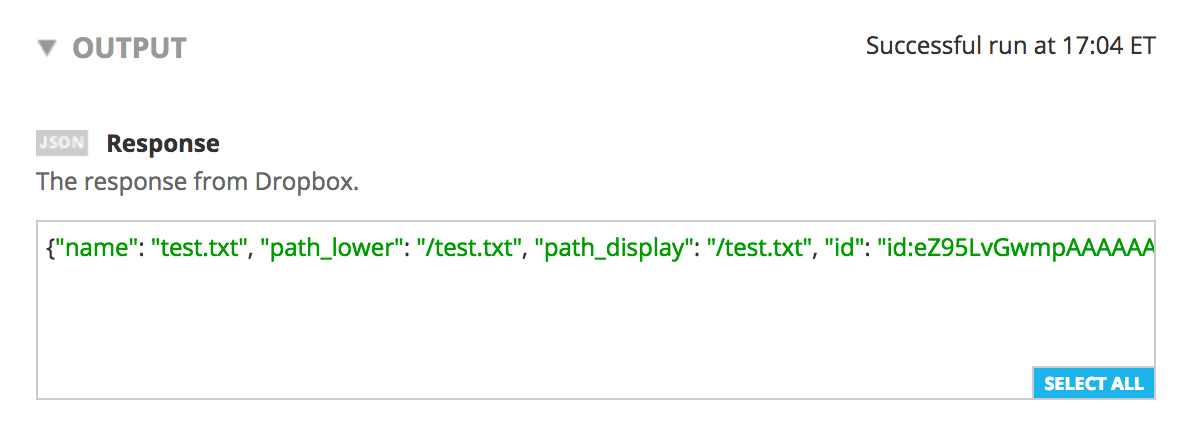
17 Go to the Dropbox > Files > Upload page in our code generation library. From the drop down menu at the top of the page, select Javascript.
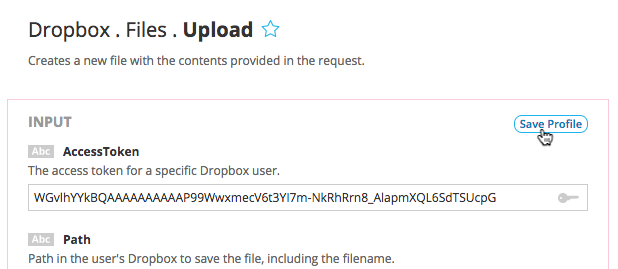
18In the INPUT section of the page, enter your Dropbox AccessToken. Click on Save Profile in the upper right corner of the INPUT section to save your Dropbox credentials for easy use in other Dropbox Choreos in the future. Using a Temboo Profile will also make your code simpler and more secure.
19Enter the file location and filename for your new file in the Path field. To create a text file in the root directory of your Dropbox account, try entering /test.txt for your Path.
20Now supply the FileContent of your text file. We'll just use "Hello world!".
At this point, your INPUT section should look something like this:
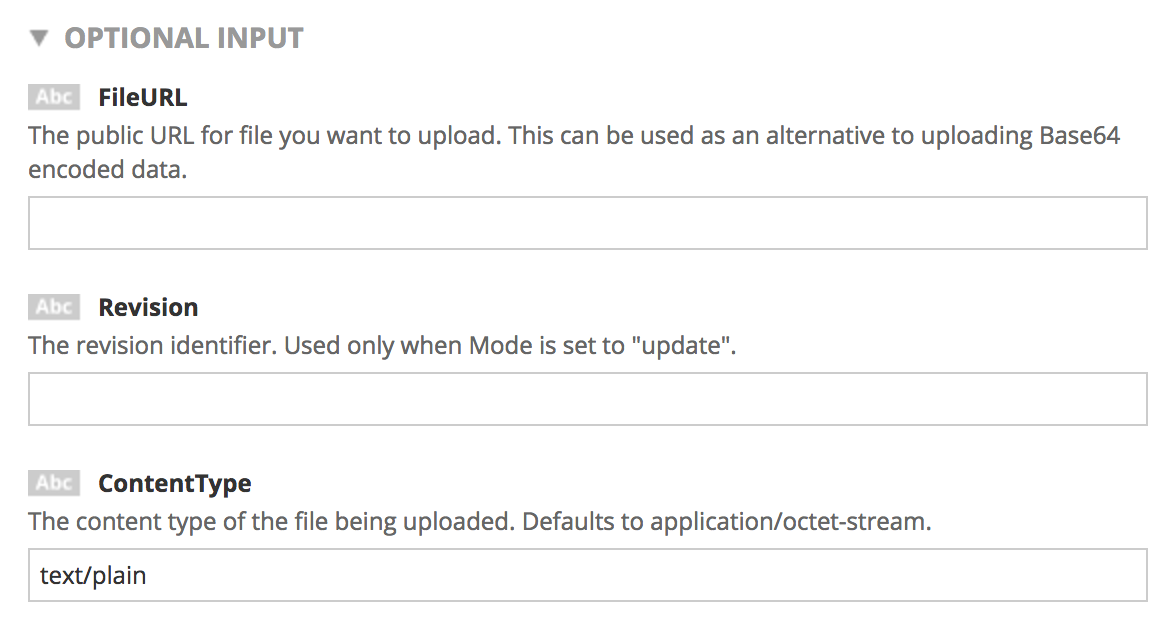
21We need to tell Dropbox that our file content is plain text rather than Base64 encoded binary data. To do so, click on OPTIONAL INPUT at the bottom of the INPUT section to reveal more input fields. In the ContentType field, enter text/plain. You can leave the other fields blank.
22Click the Generate Code button at the bottom of the INPUT section to test the file upload from the Temboo site. You'll see some details about your uploaded file in the OUTPUT section. If you go to your folder in Dropbox, you'll see your file appear.
23Dropbox won't allow you to upload a file if there's already a file with the location and filename specified in the Path input. Delete your test file in Dropbox so that you can run the same code again from your JavaScript application.
24Scroll down to find the CODE section of the Choreo page. Copy and paste the code snippet into your index.html file.
25In the same file, make sure that your script source points to the correct location of the temboo.js SDK file.
<!-- Adjust to point at the copy of the Temboo JavaScript SDK on your server -->
<script src="js-sdk/js/temboo.js">< /script>
26In the same file, we'll also want to confirm that the location of our proxy is correctly specified. Our server is proxy-server.php.
// Instantiate the client proxy with the URI of your server proxy
var temboo = new TembooProxy('proxy-server.php');
27You'll notice another code snippet box below the Code section on the Choreo page called Proxy Code. Use the dropdown menu to select PHP, then copy and paste the code snippet into your proxy-server.php file.
28In the proxy-server.php file, make sure that the require_once line points to the correct location of the PHP SDK file in the php-sdk folder that you downloaded earlier.
require_once('php-sdk/src/temboo.php');
29Let's also make sure that we can see the success of our file upload in the browser. In your index.html file, find the find the line in the showResult success callback function where raw outputs are displayed and change the console.log statement to a document.write statement:
        // Display raw outputs
        for(var name in outputs) {
            document.write(name + ': ' + outputs[name]);
        }
30Run your PHP server.
31Navigate to your index.html page in a browser. You should see the details of your file upload, and you'll have a new text file in your Dropbox folder.
We're all finished! You now know how to write a JavaScript application that uploads an image file from a URL to your Dropbox folder. Check out the rest of the 2000+ Choreos in our Library and discover all sorts of other valuable data that you could save to Dropbox.
Once you've got your code up and running, you're ready to move on and do more. From monitoring your running applications, to moving your generated Temboo code to your preferred development environment and sharing it with colleagues, collaborators and friends - we've got you covered.
We're always happy to help. Just email us at support@temboo.com, and we'll answer your questions.